
We asked you to pick the fabric
… and two blouses were born!
I’ve recently reorganized all of my fabrics and have realized just how many I have forgotten about or haven’t gotten around to using. With a little help from you guys, I set out a poll asking what I should use for my next project.
You guys chose: Lightweight - sheer - matte - solids - knit
On to the drawing board to create some designs with your suggestions….
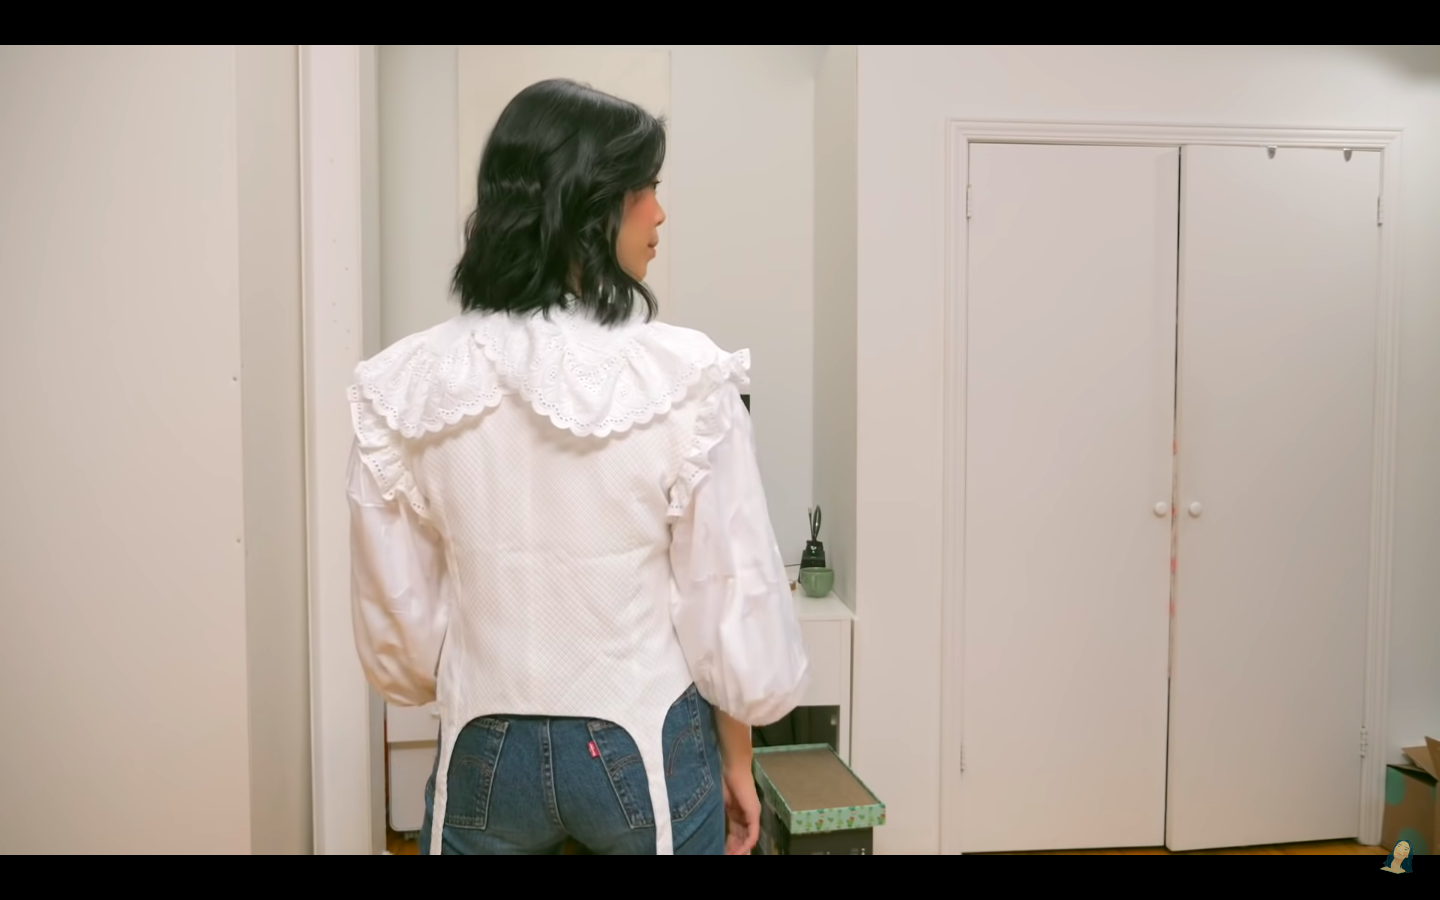
Look 1: For my look, I would like to incorporate big collars, balloon sleeves, and everyday lingerie as the inspiration. I will be using the cotton eyelet material and a few other white cottons for the fabric!
1. Using my Lutterloh pattern to help draft out a template, I picked a pattern with a fitted bodice, and a collar, and began tracing out a front, back, and collar. I wanted to draft my own sleeve pattern in order to achieve a large balloon sleeve.
The front has a large dart to accommodate the bust as well as I changed the drop shoulder by extending it by 8cm and also lowered the armpit by 5cm for comfort. Repeat this on the back as well.
For the garter strap detail, I added this extra bit to the front and the back, which will hopefully come together once it’s all sewn together.
2. Cut the pattern out. I utilized the lace trim for the collar and any edging. I also realized I needed more material so I added some more white cotton from my materials.
Cut the pattern out in a lining material as well.


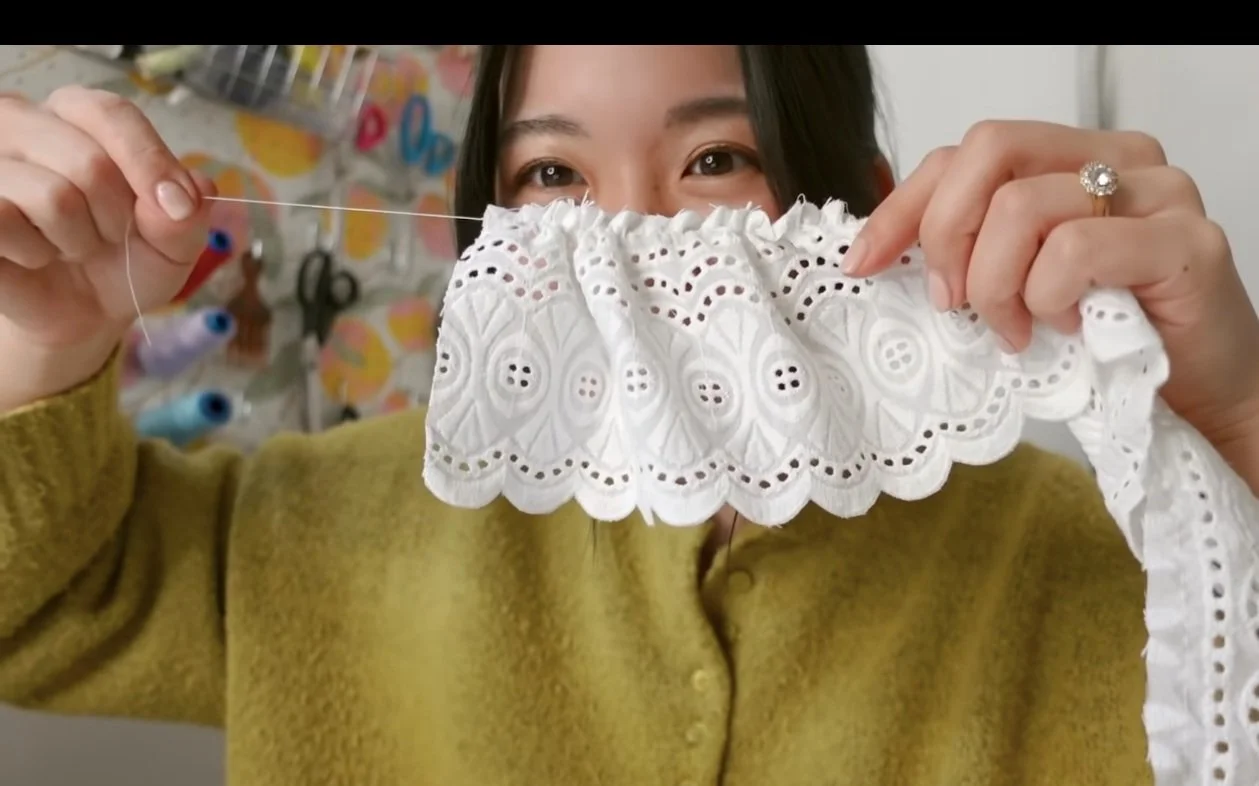
3. I joined strips of eyelet cotton, sewing them together to create one large strip.
4. Trim and press the seams. Cut the strip in half, so we can have a collar on either side!
5. Using the longest stitch length, straight stitch the straight edge of the cotton.
6. Gather the cotton to the desired ruffle/size until it is the same size as the cut collar template.
7. Sandwich the ruffled cotton between the two collared pieces right sides together, and pin it in place.
8. Sew the collar shut, leaving an opening to flip it right sides out.
9. Hem the side edges of the ruffles using a straight stitch.
10. Using a top stitch, fold the raw edges within the collar and close up the opening.
11. Sew in the darts. Press the seams towards the side of the body.
12. Repeat these steps in the lining.
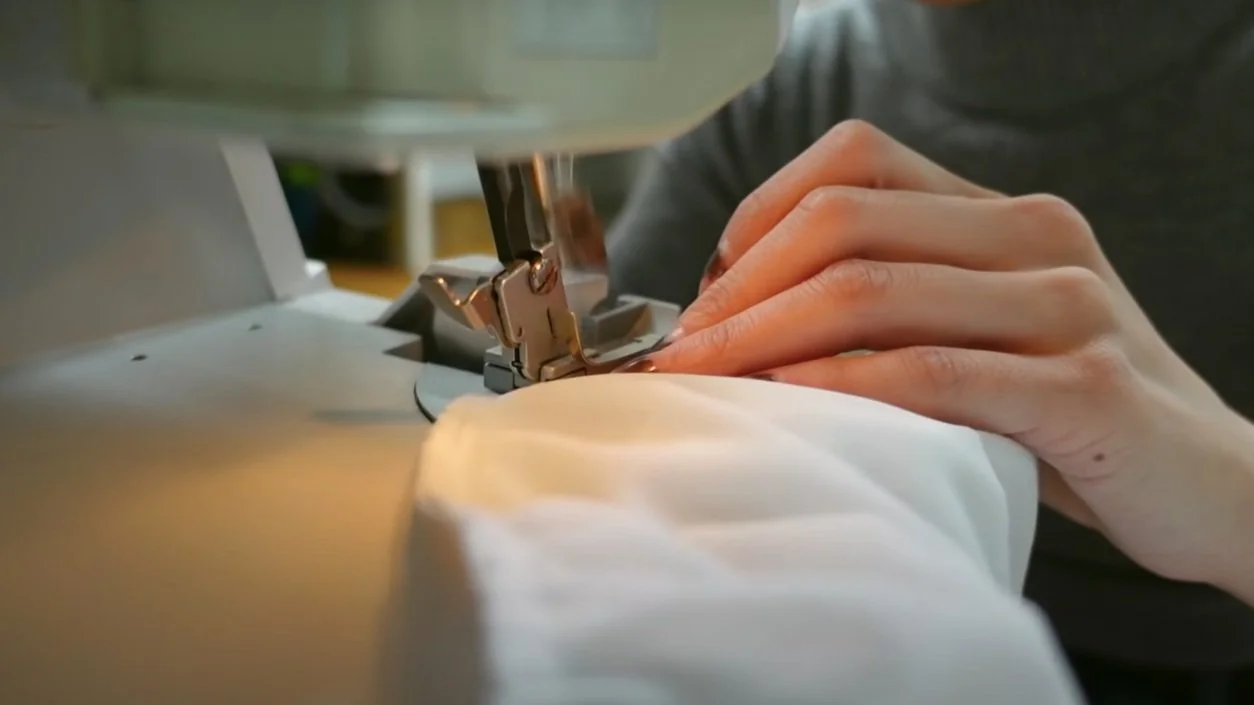
13. Sew the bodice together at the shoulders and at the side seams, right sides together.


14. For the sleeves, I massaged two of my Lutterloh sleeve patterns to create a balloon sleeve.
15. Cut a strip of the lace to create a ruffle at the base of the sleeves.
16. Gather the ruffle and create a loop by sewing the two right sides together.
17. Using the same gathering stitch, gather the top of the armhole.
18. Close the inner seam of the sleeve shut.
19. Pin the sleeve to the vest of the shirt, sandwiching the ruffle in between the layers.
20. Sew both sleeves using a straight stitch.
21. Join the shell and the lining, right sides together, sewing across the neckline and down the front, and continue around the garter straps at the bottom of the shirt. Leave an opening to flip the shirt's right sides out. Blanket stitch the seams of the shirt all the way around.
22. I trimmed the front bottom of the shirt to sit more at my waist.


23. Understitch the lining all the way around to keep it sitting flat.
24. Flip the shirt's right sides out.
25. Sew a strip of hook and eye tape to the front opening of the shirt as close to the edge as possible to keep it neat.
26. Tuck away the raw ends, fold the hook and eye tape over, and straight-stitch the top. Press everything flat.
27. Finish off the sleeves by encasing an elastic to the bottom of the sleeves to create a ruched sleeve.
28. Sew the two crescent collars together.
29. Sew snaps to the shirt and collar to create a detachable collar.


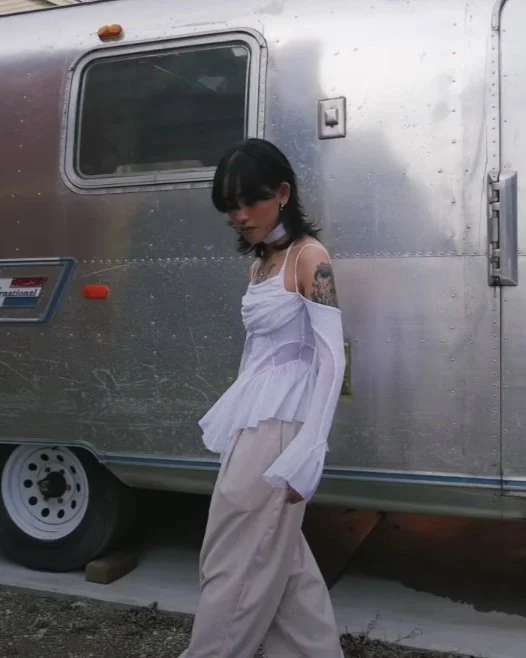
Look 2: For Julia’s design, she chose to incorporate cutouts and straps, draping across the chest area, flared sleeves, and godets, tied in with a y2k halter look. She will be utilizing the white mesh I have in my stash!
1. To draft out the pattern, Julia ended up using a long-sleeve sweater she had as her basic block. She added out her styled lines and drafted out her godet as well.
2. Cut the pattern out.
3. Using a serger, serge the front pieces together and the back pieces together. The front and back consisted of 4 individual pieces, these were joined to create just one front and back piece with visible seams.
4. Connect the front and back together, and sew in the godet. Make changes if needed. Her first godet was not flared enough so she created a larger godet for more ruffle.
5. Julia then began sewing the sleeve. As it wasn’t flared enough, she cut an extra godet for the side of the sleeve.
6. Cut part of the sleeve to insert the godet. Sew the sleeve shut.
7. Julia then hand-sewed all the visible seams to ensure they were stitched in place and looked neat.
8. Drape out the front drape of the shirt on your mannequin. Pin in place.
9. Cut and sew the drape to the front of the shirt.
10. Cut and sew straps that are 1/4” thick.
11. Sew the sleeve onto the vest, taking the long straps you’ve created, and encasing the entire top of the shirt, while catching the sleeves as well.
12. Serge the seams to ensure nothing frays.


The Final Look….


EEK! Now I can finally go shop for some more fabrics!